A Guide to Claude & Airtable Integration
GenAI
Workflow Automation
Capitas Team
Airtable recently introduced built-in AI features - but if you’ve checked out their pricing, you know it can get expensive fast. Luckily, you can integrate your own AI model (Anthropic’s Claude, in this case) directly into Airtable using a simple script. This approach gives you far more flexibility with prompt engineering and typically costs much less than Airtable’s AI plans. In this post, we’ll explore:
1. Why you might want to bring your own AI
2. A simple script to connect Claude to Airtable
3. Fun ways to adapt this setup
Why Bring Your Own AI to Airtable?
A. Cost Savings
Airtable’s AI features might be convenient, but convenience can come with a hefty price tag. By using your own Claude API key:
- You pay only for what you use, rather than a monthly per-seat fee.
- If your team processes a moderate amount of AI tasks, hooking in your own API can be significantly cheaper in the long run.
B. Full Control Over Prompts
When using Airtable’s built-in AI, your customization options may be limited. By handling requests yourself:
- You can fine-tune the system prompt and user prompts.
- You can switch models (Claude vs. OpenAI GPT, or different versions of Claude) as you see fit.
- You can tweak settings like max tokens, output formatting, and more, to get exactly the results you want.
C. Direct Debugging & Logging
With your own script, every API call is logged. If something goes wrong, you can easily inspect request/response details to figure out the issue—something not always possible with an out-of-the-box AI feature.
The Script: Classifying Companies with Claude
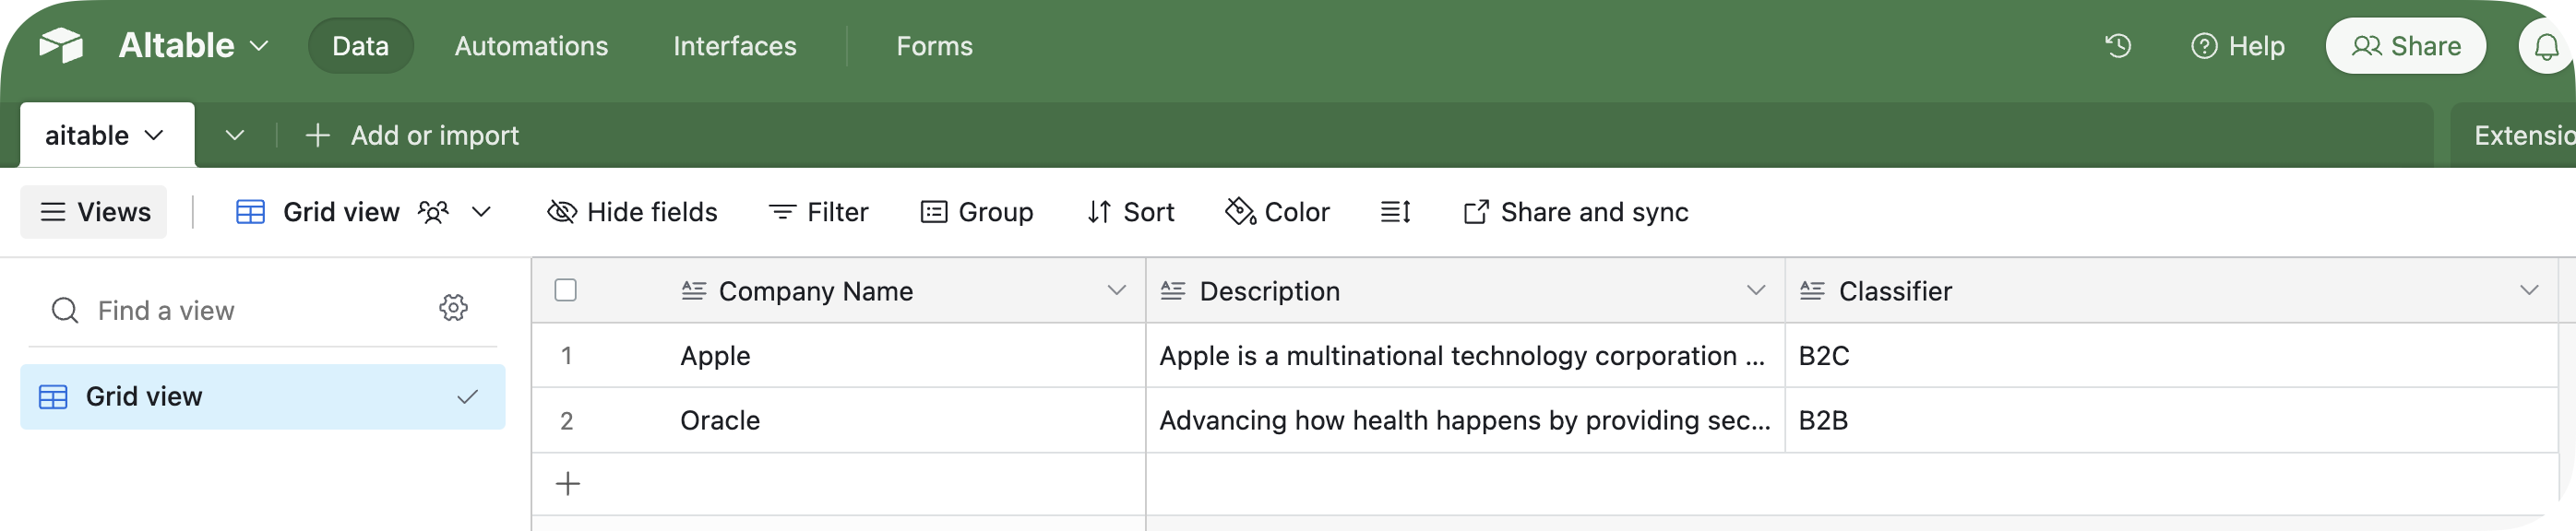
Below is an example script you can run in an Airtable Scripting Extension or as an Automation. It reads from a Description field and writes to a Classifier field, categorizing each record as either “B2B” or “B2C”.
// Configuration
const ANTHROPIC_API_KEY = 'YOUR-ANTHROPIC-API-KEY'; // Replace with your actual API key
const INPUT_COLUMN = 'Description';
const OUTPUT_COLUMN = 'Classifier';
const SYSTEM_PROMPT = 'You are Claude, a helpful AI assistant. Please provide concise responses.';
const USER_PROMPT = `You are a company classification expert.
Categorize the following company into exactly one of these categories:
B2B, B2C. Do not output anything else.`;

// Main automation script
let table = base.getTable('aitable'); // Replace with the name of your table

// Get all records where output is empty
let query = await table.selectRecordsAsync({
    fields: [INPUT_COLUMN, OUTPUT_COLUMN]
});
let records = query.records.filter(record => !record.getCellValue(OUTPUT_COLUMN));

console.log(`Found ${records.length} records to process...`);

for (let record of records) {
    let inputText = record.getCellValue(INPUT_COLUMN);
    let recordId = record.id;

    if (!inputText) {
        console.log(`Record ${recordId} has no input; skipping...`);
        continue;
    }

    // Build the payload for the Messages.
    const payload = {
        model: 'claude-3-5-sonnet-20241022', // Using the desired model
        max_tokens: 1024,
        system: SYSTEM_PROMPT,
        messages: [
            {
                role: 'user',
                content: USER_PROMPT + inputText
            }
        ]
    };

    console.log(`\n--- Processing record ${recordId} ---`);
    console.log(`Input text: ${inputText}`);
    console.log(`Payload being sent:\n${JSON.stringify(payload, null, 2)}`);

    try {
        console.log('Sending request to Anthropic Messages API...');
        // Use remoteFetchAsync()
        const response = await remoteFetchAsync('https://api.anthropic.com/v1/messages', {
            method: 'POST',
            headers: {
                'Content-Type': 'application/json',
                'x-api-key': ANTHROPIC_API_KEY,
                'Anthropic-Version': '2023-06-01'
            },
            body: JSON.stringify(payload)
        });

        console.log(`Response status: ${response.status}`);
        if (!response.ok) {
            const errorText = await response.text();
            console.error(`API request failed. Status: ${response.status}. Body:\n${errorText}`);
            continue;
        }

        // Read and log the raw response text for debugging
        const rawText = await response.text();
        console.log(`Raw response for record ${recordId}:\n${rawText}`);

        let result;
        try {
            result = JSON.parse(rawText);
        } catch (parseError) {
            console.error(`JSON parse error for record ${recordId}:`, parseError);
            continue;
        }

        // Check for the expected "content" field in the response.
        if (!result.content || !Array.isArray(result.content)) {
            console.error(`No 'content' array in the response for record ${recordId}. Full result:`, result);
            continue;
        }

        // Extract text from the content blocks (assuming blocks of type "text")
        let assistantAnswer = '';
        for (const block of result.content) {
            if (block.type === 'text') {
                assistantAnswer += block.text;
            }
        }
        assistantAnswer = assistantAnswer.trim();
        console.log(`Assistant answer for record ${recordId}:`, assistantAnswer);

        // Update the record with the assistant's answer
        await table.updateRecordAsync(record, {
            [OUTPUT_COLUMN]: assistantAnswer
        });

        // Small delay to avoid hitting rate limits
        await new Promise(resolve => setTimeout(resolve, 500));

    } catch (error) {
        console.error(`Error processing record ${recordId}:`, error);
    }
}

console.log('Processing complete!');
Getting Started
- Create a table (e.g.,
aitable) with:
Description(text)Classifier(text)
- Add a few sample records with a description of the company. Leave
Classifierblank. - Open a Scripting Extension (or create an Automation with “Run Script”) in Airtable.
- Paste the script above, replace the API key, and run it.
You’ll see console logs indicating each record is being processed. Once it finishes, the Classifier field will be filled with Claude’s classification for each company.
3. Awesome Ways to Adapt This Setup
A. Summaries & Highlights
- Prompt: “Summarize the following text in 3 bullet points.”
- Use Case: Summaries for meeting notes, project updates, or lengthy documentation in Airtable.
B. Sentiment Analysis
- Prompt: “Label this feedback as Positive, Negative, or Neutral. Do not provide extra text.”
- Use Case: Quick gauge of overall sentiment in customer feedback or user surveys.
C. Brainstorming & Idea Generation
- Prompt: “Generate 3 promotional headline ideas for the following product description.”
- Use Case: Short marketing copy or social media posts, right from within Airtable.
D. Tagging & Keyword Extraction
- Prompt: “Extract relevant tags for the following article. Output them comma-separated.”
- Use Case: Automated content categorization for blogs, videos, or any library of documents.
E. Translation & Language Tasks
- Prompt: “Translate this text to French.”
- Use Case: For multi-lingual support or quickly localizing content for different regions.
The beauty of this setup is its flexibility. You can adjust the prompts and parameters to suit your specific needs, and since you're using the Claude API directly, you can take advantage of new features and improvements as they become available.
Remember, the script provided here is just a starting point. Feel free to modify it based on your needs, and don't be afraid to experiment with different prompts and approaches. The possibilities are limited only by your imagination – and maybe your API quota.
Whether you're looking to save money, gain more control over your AI interactions, or just explore what's possible with custom integrations, bringing Claude into your Airtable workflow opens up a world of possibilities. Give it a try, and let us know what you create!
Check our other articles
A Guide to Claude & Airtable Integration
Learn how to integrate Claude AI into Airtable using your own API keys for scalable, customized automation.

What Is Agentic AI?
Discover how agentic AI transforms businesses, its impact on the workforce, and five key actions leaders must take to stay competitive.

Marketers' Agency Partnerships Are Strained.
Hybrid models supported by generative AI and the right capabilities can increase both efficiency and expertise in marketing